Section Branding
Header Content
Top 10 EdTech Tips: Seesaw
Primary Content

Seesaw is an online learning journal that gives students the ability to digitally showcase what they are learning about in school. Here are five facts about Seesaw that will help you use it in your classroom.
1. Student Driven
Seesaw empowers students to take ownership of creating their own journal by taking the task of uploading work out of your hands and placing it into the student’s. You can also upload, organize and manage portfolios if you choose, but allowing students to upload items lessens the tedium of organizing countless amounts of files for parent conferences or student evaluations.
2. User-Friendly Features
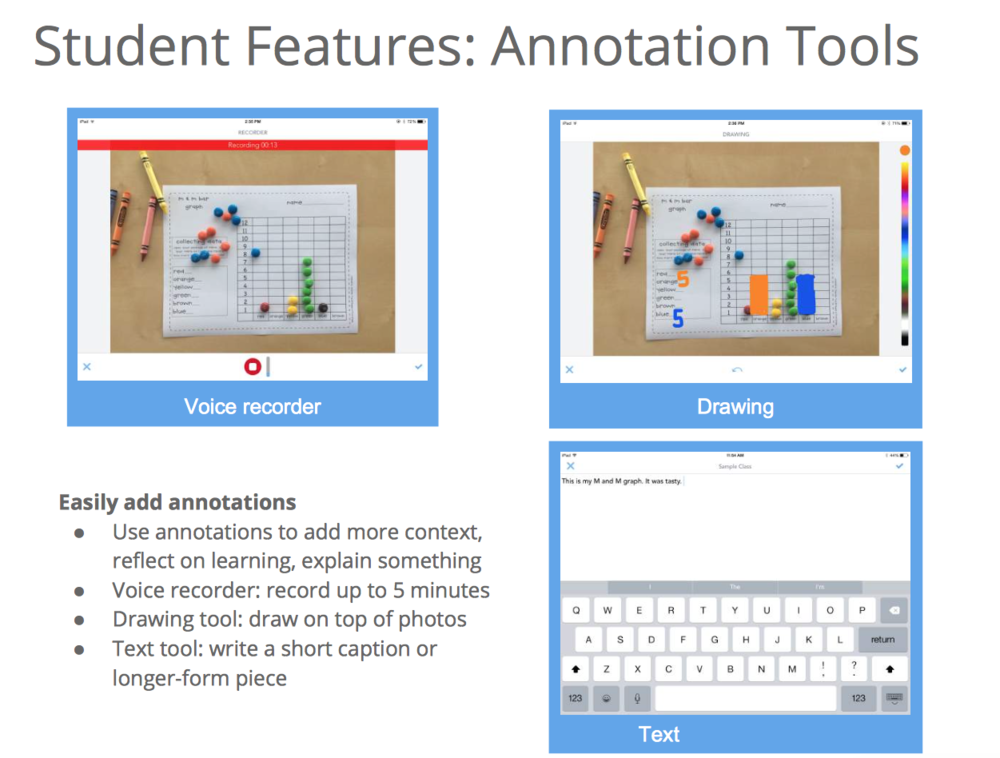
Seesaw’s user-friendly features make it easy for young children to manipulate. Students upload their work by simply taking a photo and can add voice explanations, drawings or text to the uploaded image. They can also create original drawings and videos or access their camera roll to view or add additional documents.

3. Available on Multiple Devices
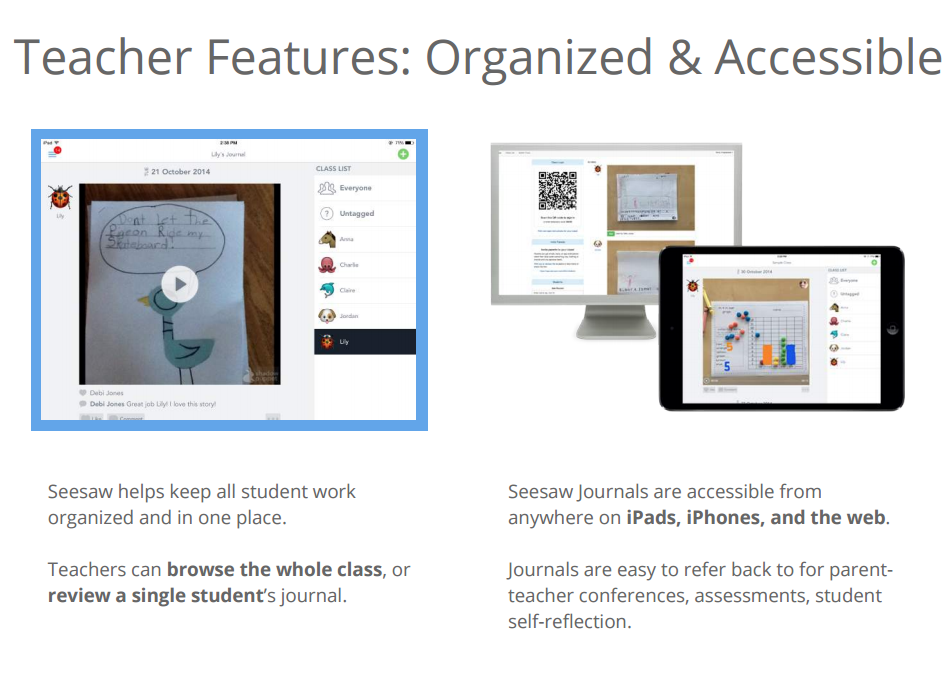
Students’ journals are accessible on the web, apple devices, Chromebooks and androids. This makes it easy for all students, teachers and parents to keep track of the work children are completing in the classroom no matter what device they are using.
4. Great for Parent Contact
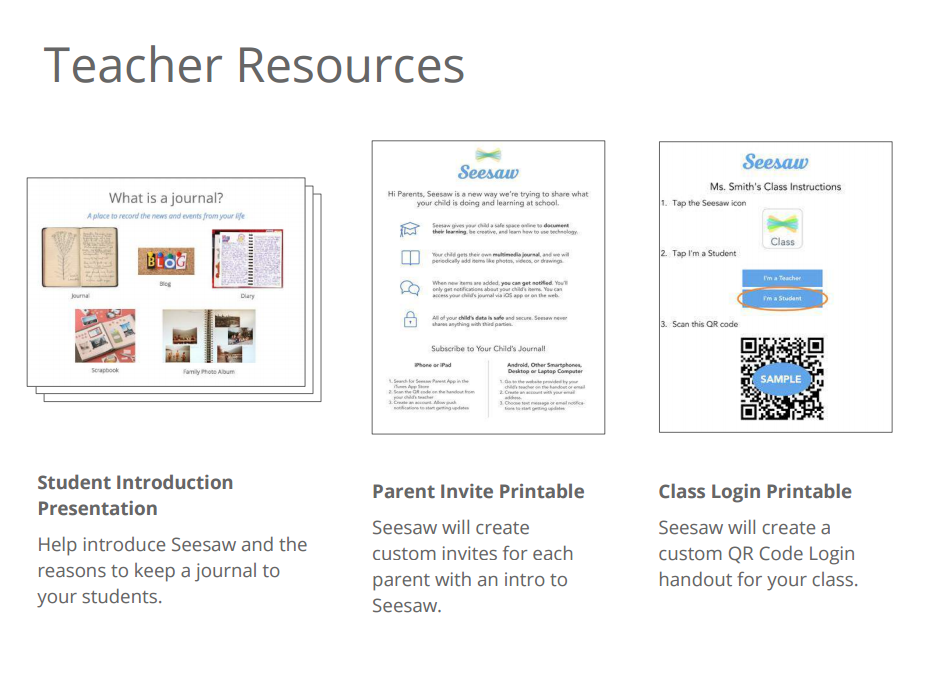
A great way to keep parents engaged and informed on what their children are working on in the classroom is to encourage them to sign up for Seesaw. Seesaw will even create a customized “parent invite handout” that you can send to them. Once parents subscribe, they are granted access to their child’s journal and will receive notifications when new documents are added. Parents can even add comments to what they are viewing.
5. Great for Self-Reflection
You can use Seesaw to help young students practice self-reflection. Once students have uploaded their work to Seesaw, they can then use the program’s features to annotate or record audio files on what they are working on and how they can improve their work in the future. Before moving on to a new assignment, have students review their notes and make improvements where needed.
6. Classroom Sign-Up
Once you have created an account, you can immediately begin creating classes by simply naming your class and adding your students’ names to the roster. You can then print out your classroom login handout, equipped with a unique QR code, for your class. Remember to allow Seesaw to send you notifications so that you are informed when students add new items to their journals and parents comment on uploaded work.
7. Teacher Features
The teacher dashboard is easy to navigate and keeps everything organized and easily accessible. You can choose to browse work from the entire class or a single student’s journal. Seesaw also lets you organize student work in colored folders. This enables you to categorize work by unit, learning objective or however you see fit. You can then instruct students to upload their work into designated folders or you can place them in folders yourself through item approval. In addition, you can edit uploaded items, flag items to review later (flags are only visible to teachers and co-teachers) and approve or disapprove items students are attempting to upload to their journals.

8. Great Teacher Resources
Seesaw has a wealth of resources that you can access in order to assure you are using it to its fullest potential. Resources include tips on how to get started, professional development and more than 30 activities aligned to Common Core. You can access their resources by clicking here.

9. App Compatibility
Seesaw's compatibility with a variety of apps allows you to share PDFs, videos, links and other documents with your students. Click here to find a list of Seesaw compatible apps. You can also share single items to blogs, websites, or popular social media sites like Facebook and Twitter. When doing this, it is important to maintain a student’s anonymity by making sure that anything indicating his/her identity is removed. This includes the student’s name, class icon and comments unique to that student’s work.
10. Privacy Settings
Seesaw allows you to customize your privacy settings and limit student viewership. Once students begin uploading their work, the default setting allows them to view their classmates’ work as well. You may change these settings to limit their viewership. One setting only allows the student to view their own work and the most restricting setting only allows the teacher to view student submissions.
Check out the video below for a brief overview of Seesaw and its capabilities.
Are you using Seesaw in your classroom? Let us know how by leaving a comment below!
Secondary Content
Bottom Content


